App deployment and data collection for learning analytics
Setting up a learning application for tracking
In the chapter “Hosting learning applications and the web API”, you set up a server with the web API that acts as endpoint at https://<SERVER>/api/ for collecting the tracking data that comes from the learning applications. For each application that you deploy, you need to set this endpoint in the frontmatter options of its RMarkdown file under apiserver, e.g.:
# ...
output:
    learnrextra::tutorial:
        language: en
        apiserver: https://<SERVER>/api/
# ...
This will make sure that the deployed learning applications know where to send the collected data.
Learning application deployment and registration
Each learning application needs to be deployed (i.e. transferred to a Shiny server) and registered in the administration backend. This administration interface is available under https://<SERVER>/api/admin/ after you installed it on a server.
While a deployed app can be used without registration, it is necessary to register your app in the backend in order to collect tracking data and run experiments. Depending on how the backend system was set up (see “Setting up the web API and the administration interface”), there are two ways to deploy and register your apps:
Option 1: Deployment and registration via the administration interface
If you set up the administration and API backend to support the app deployment via upload, all you have to do in order to deploy and register your app is the following:
Use renv in your learning app project.
Create a snapshot of the necessary packages for your learning app by running
renv::snapshot(). This will create arenv.lockfile that lists all dependencies of your application.Create a ZIP-file containing your learning app along with its
renv.lockfile.After logging in to the administration interface, go to API > Applications and select Add application. You will see the form displayed below. Give the new learning application a name and select the ZIP-file for upload.
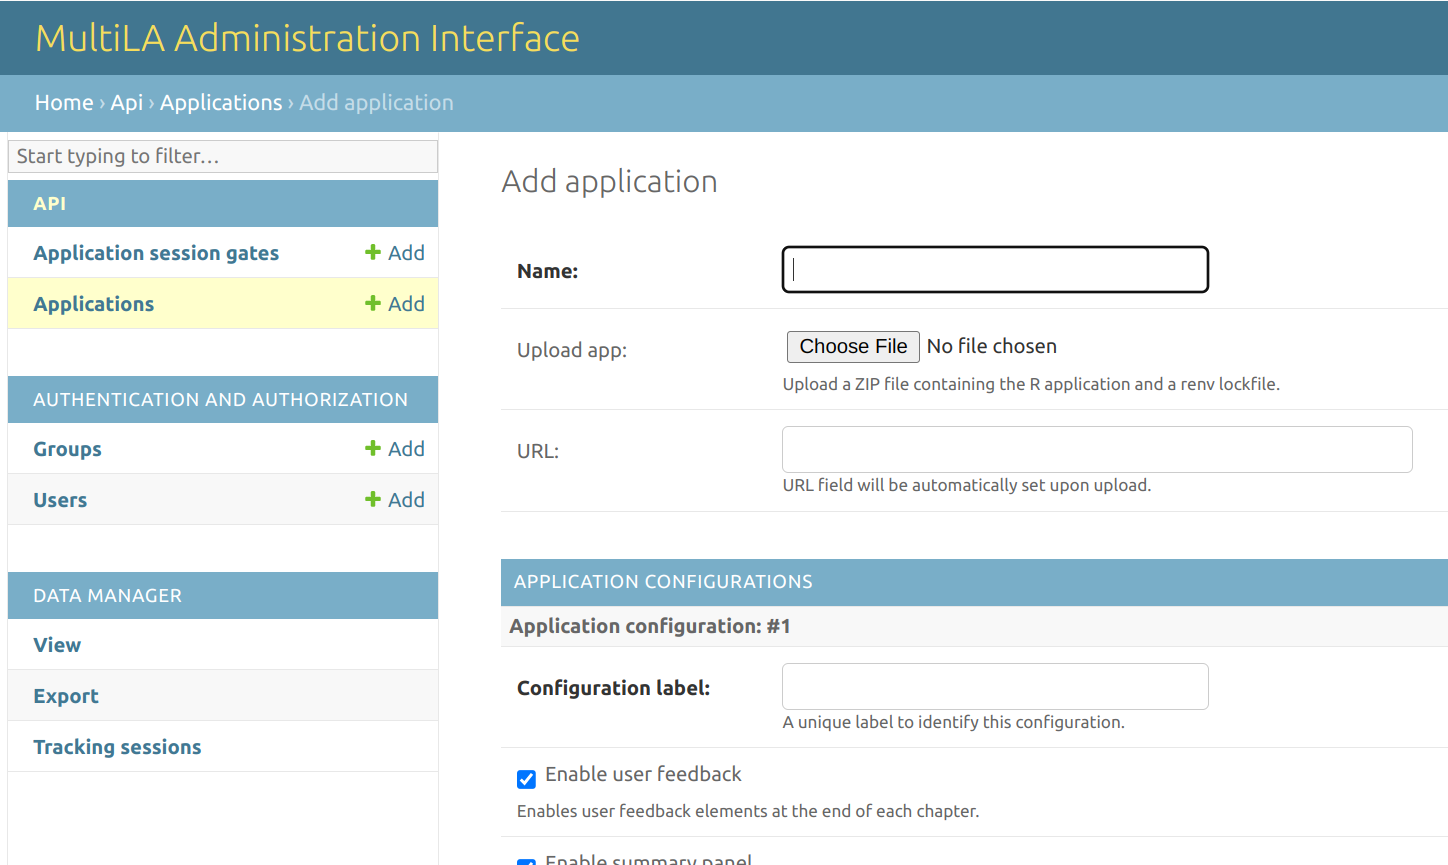
The app will be uploaded and dependencies listed in the renv.lock file will automatically be installed, if the backend system is set up correctly. If anything fails during dependency installation or when running the app, the respective log files will be shown next to the form. Please note that in the current version, the app installation status and log file display is not automatically updated, i.e. you need to reload the page in your browser for updates.
Warning
Most dependency package installations for an app fail due to missing operating system packages. The installation log will provide the respective information in the case of such an error. The server administrator will then have to install the respective system packages and you need to retrigger the installation by re-uploading the application.
For each learning application, you can create several application configurations. These allow you to create different variants of the same base application and also allow you to configure the tracking behavior. You need to at least create one default configuration, so you should fill in at least the configuration label for the first configuration that is displayed directly underneath application configurations in the form.
You can update an existing app by uploading a new ZIP-file. Dependency installation will then be retriggered but already installed R packages will be skipped.
You can still register an application that was not deployed via upload to the administration interface by setting the URL of your manually deployed app in the “URL” form field.
Option 2: Manual learning application deployment and registration
Use this option when you the backend system is not set up for app deployment via upload or you don’t want to use that feature.
It’s highly recommended to use renv during deployment. First, create a snapshot of the necessary packages for your learning app by running renv::snapshot() locally. Create a folder for your application on the server. Then copy only the following files from your local machine to the app folder on the server:
RMarkdown document (.Rmd) – make sure to set the
apiserverin the frontmatter options to the URL at which the web API will be available, e.g.https://<SERVER>/api/renv.lockwith all dependencies necessary to run your learning applicationpossible embedded images, CSS, JavaScript, etc. in folder
imagesorwww
On the server, navigate to the app folder and open an R session there (by simply invoking R in the terminal. There, run the following code to set up renv for the app and install all packages that reported in renv.lock:
renv::init()
renv::restore()
Please note that you need to run renv::snapshot() locally every time you update/install packages and that you also need to copy the updated renv.lock to the app folder on the server and run renv::restore() within an R session there.
Check that the application was successfully deployed by visiting the respective URL in your browser (depends on the Shiny server setup). If anything fails, check the Shiny logs (~/ShinyApps/log, /var/log/shiny-server/access.log, /var/log/shiny-server.log).
When you publish an update for your learning application, you must also set a new timestamp to a special file named restart.txt in the learning application project folder on the server via touch restart.txt.
After logging in to the administration interface, go to API > Applications and select Add application. You will see a form as follows:
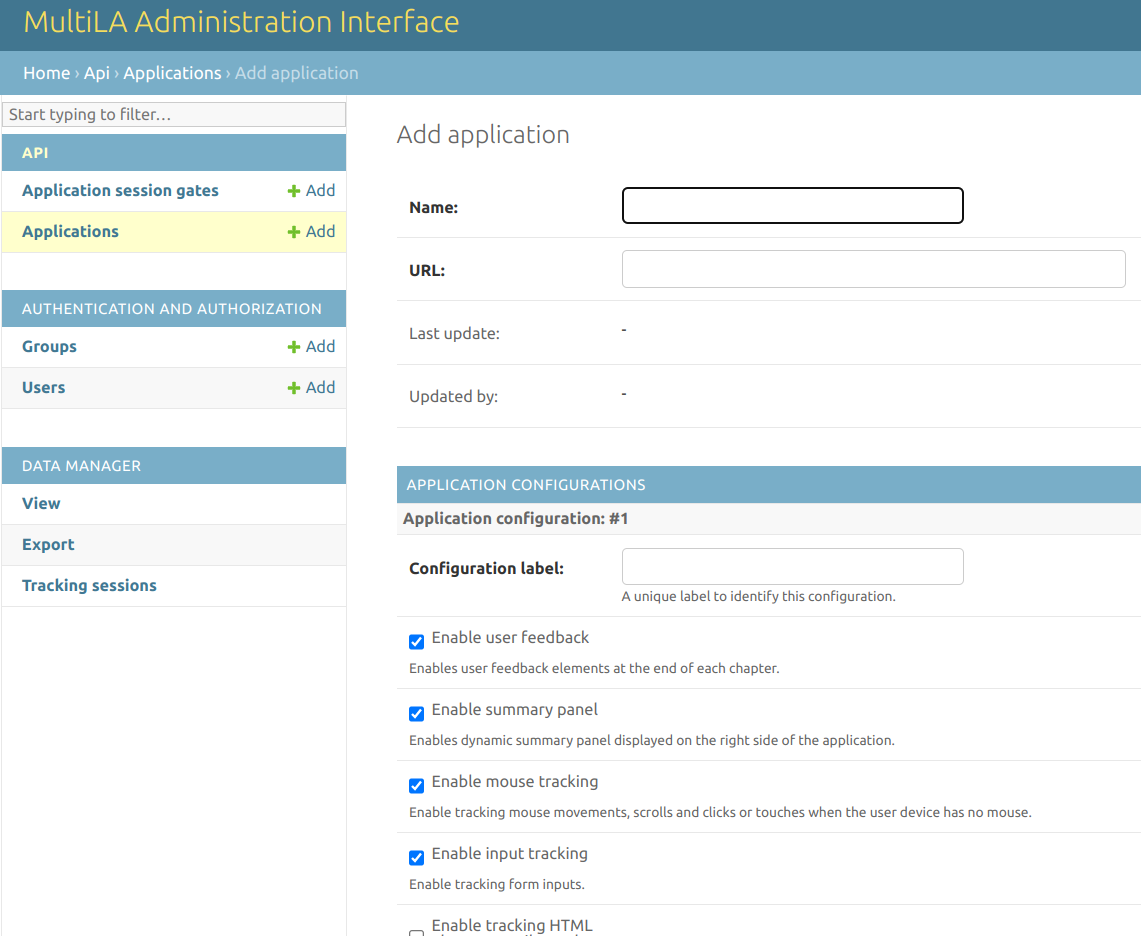
Give the new learning application a name and most importantly, enter the full URL under which it is available, e.g. https://<SERVER>/myapp/. For each learning application, you can create several application configurations. These allow you to create different variants of the same base application and also allow you to configure the tracking behavior. You need to at least create one default configuration, so you should fill in at least the configuration label for the first configuration that is displayed directly underneath application configurations in the form.
Application sessions and sharable URLs for tracking
The applications list shows all your apps that are registered with the backend system.
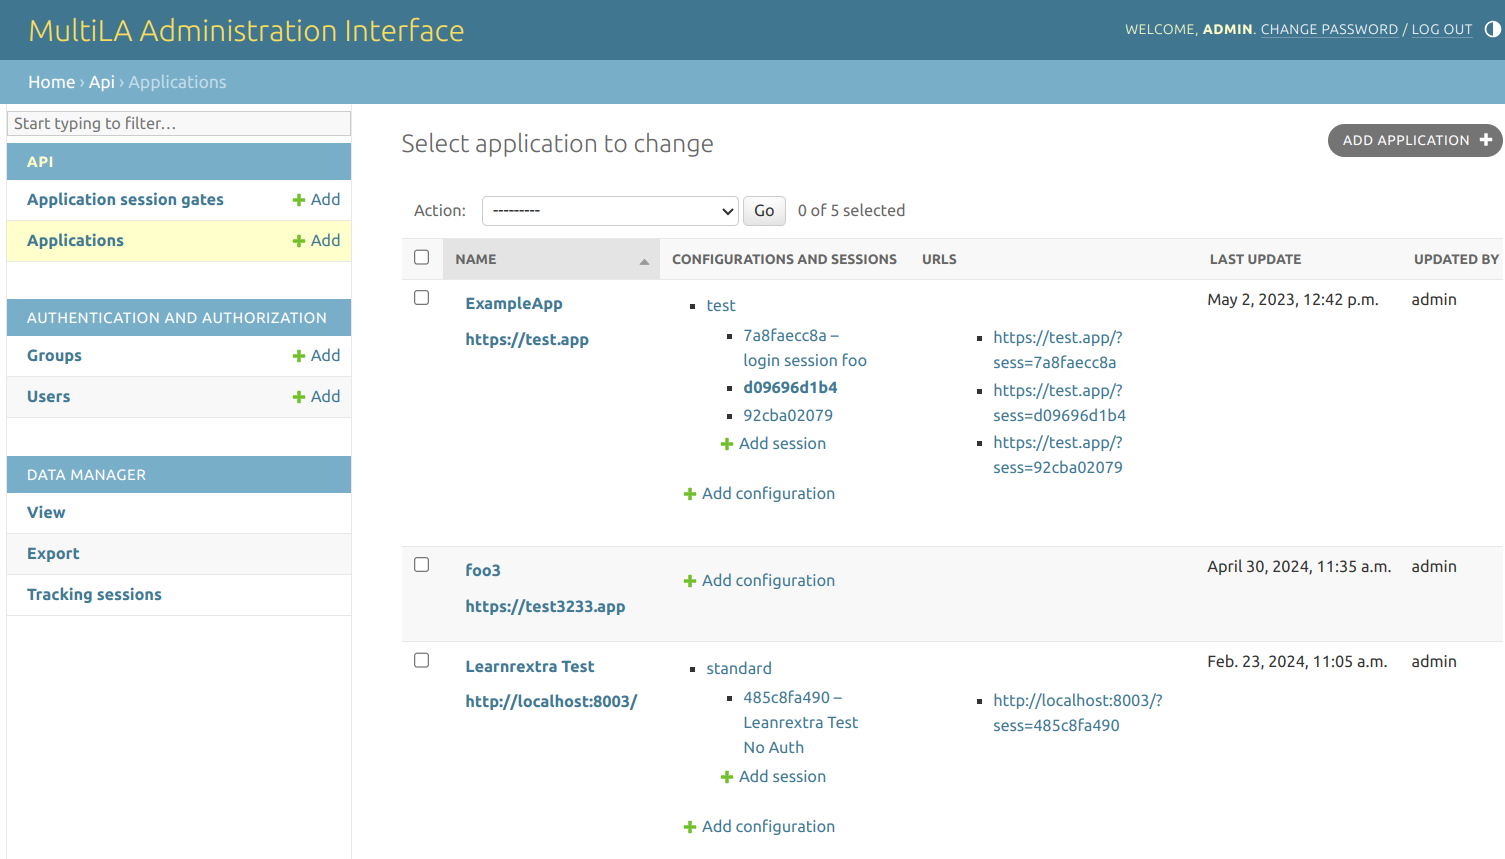
An application session is an instance of your configured learning application for which you collect tracking data. Each application session will receive a unique session ID and therefore a unique URL in the format https://<SERVER>/api/gate/<UNIQUE_ID> that you can share. This URL is then also displayed in the applications list. The URL is very important: If visiting this URL and consenting to data collection, a tracking session will be created for the user and tracking data will be collected as configured in the application configuration while the user interacts with the learning application. This tracking data will be associated with the application session that corresponds to the unique session ID.
For each new configuration, a standard application session is automatically created, but you can add more application sessions, if you need to. This can for example be beneficial when you want to collect data for a certain occasion, e.g. a lab exercise. If you create an application session for this occasion, you can share the generated URL and will later know that the collected data belongs to that event.
To create an application session, click on the Add session link underneath the desired application configuration in the applications list. You will be presented the following form:
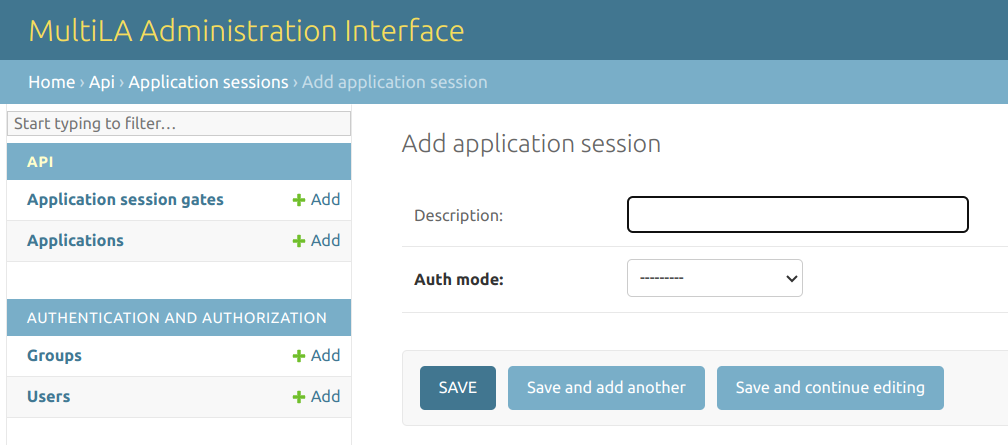
You can specify whether users should need to authenticate via login. Note that the authentication mode is very minimal: it only consists of a user name, i.e. a self-chosen pseudonym, and password (no user email or other data). Its main purpose is to allow tracking users across different devices and time as distinct user sessions. If you don’t need that, you should disable user authentication.
Note
This hierarchy of applications → application configurations → application sessions allows to create several variants of a single learning application (e.g. for A/B testing – see below) and furthermore allows to bind tracking to specific events, e.g. by creating a session for a specific teaching course or workshop. You will then later be able to download and analyse data for these specific application sessions.
Note that it is also possible to set a “default application session.” This means that every time someone visits the learning application under its base URL <my-app-url> (without the ?sess=... suffix), the collected data will be automatically associated with the default application session. If no default application session is set, a user will either be forwarded to the last application session she or he visited for that application or otherwise tracking will be disabled. You can set a default application session under API > Applications by selecting an application and setting the default application session in the form. The default application session will then be highlighted in the application list in bold font.
(Optional) Creating application sessions gates for A/B tests
If you want to use the MultiLA platform to do A/B testing for your learning applications, you can use the application session gates feature. First, create two or more application sessions (for different learning applications or different configurations for the same application). Then, got to API > Application session gates > Add and you will be presented the following form:
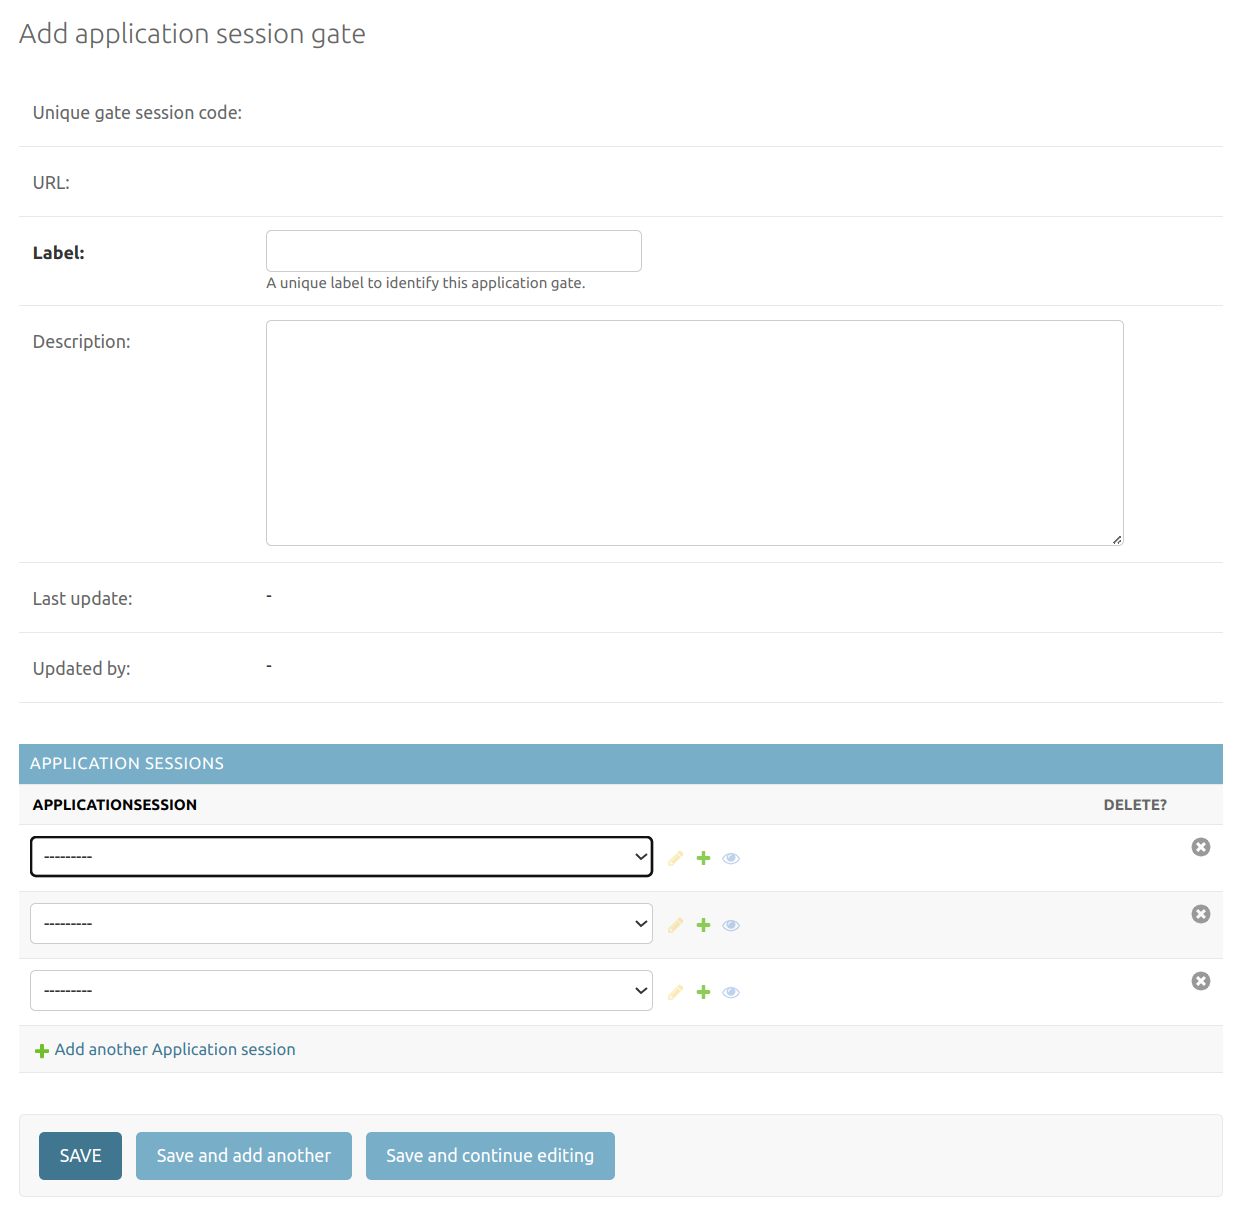
Enter a label to identify the gate and select two or more application sessions at the bottom of the form. After saving the form, a unique gate ID will be generated along with an URL. Every visit to that URL will forward the user to one of the application sessions in an alternating manner (i.e. sessions A / B / C / A / B / C / … if you have added three sessions to the gate).
Monitoring user tracking
You can monitor the collection of live tracking and user feedback data. An overview of currently collected data is presented under Data manager > View:

This overview gives some basic descriptive statistics of the collected data per application, application configuration or application session. By clicking on the small “info” icon in the Num. of feedback items column, you can view the user feedback for a given application, application configuration or application session.
You can watch live tracking data by visiting Data maanger > Tracking sessions. This will list all tracking sessions for which data is or was being collected.
Note
A tracking session is a time frame of interaction with a learning application that can be attributed to a single user. If a user visits an application session URL, a new tracking session is started if the user gave consent to tracking and if the user doesn’t already have a running tracking session for that application sessions (this is determined via browser cookies). If the user already has a running tracking session for that application session (e.g. by coming back to the page after restarting the browser), this tracking session is continued and all new tracking data is added to the already existing data in the tracking session.
The tracking sessions overview will present you a table like this:
The newest tracking session is by default shown on top. Session start and end give the time frame of the tracking session. If there’s no end time, this means that the tracking session is either currently running or that no tracking session end time could be determined (this may happen if the user’s browser for some reason doesn’t send a signal when closing the page).
The Options column allows you to see details of the tracking session and the collected data by clicking on the “info” icon. The circular arrow icon allows you to replay tracking session, i.e. to view the sequence of interactions that the user had with the learning applications like a video. Note that this feature currently doesn’t always work as expected.
Downloading and preparing tracking data for analysis
Downloading the tracking data
You can navigate to Data manager > Export in order to generate a ZIP file with the collected tracking data.
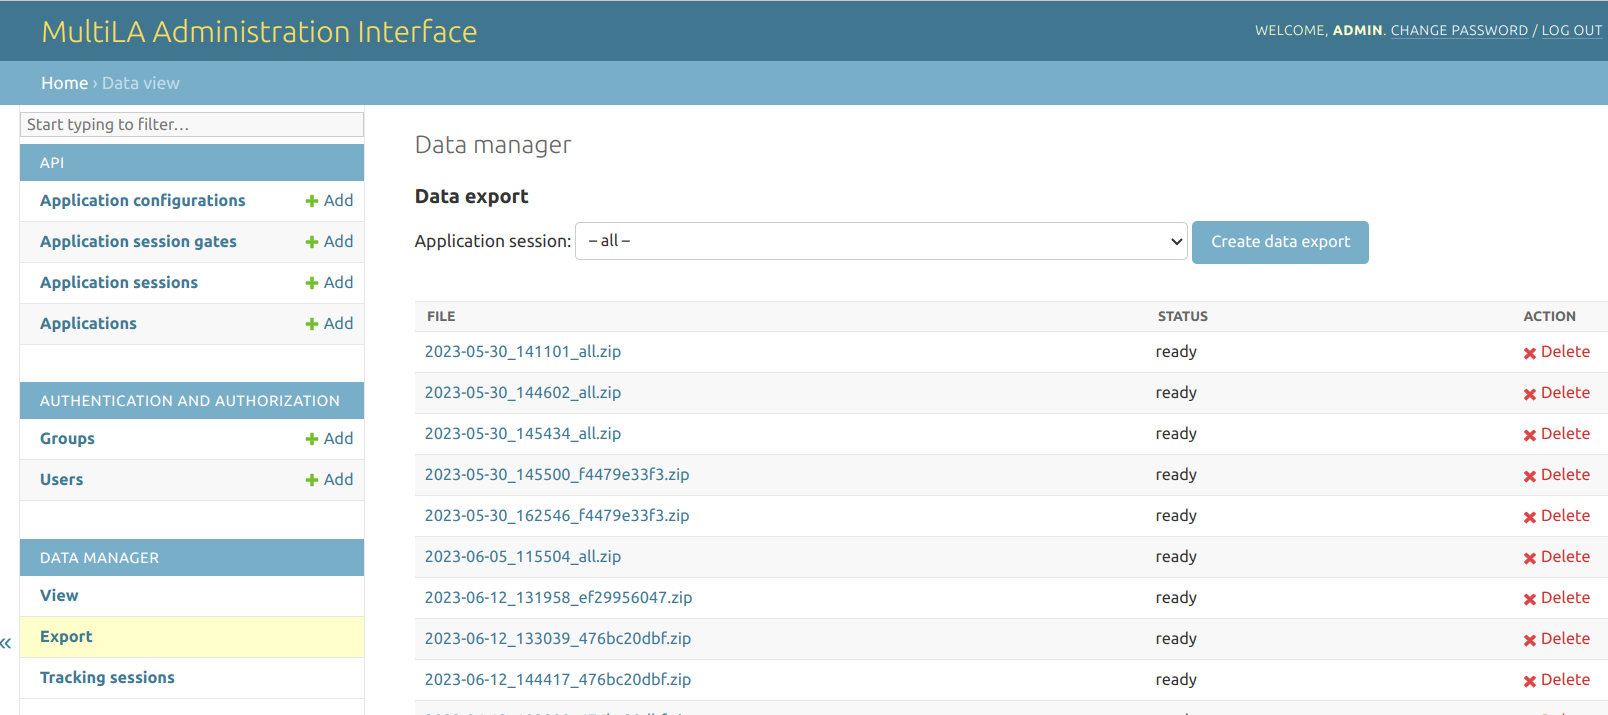
You can select which for which application session you want to create a data export or choose to create a data export for all application sessions (which is not recommended as it may create a very large file and take a long to time generate the data export). The generated ZIP file will then be listed in the table below. Once it is ready, you can download it to your computer. The ZIP file contains a PDF with a codebook and four CSV files with the data. The codebook explains the structure of the data in detail. It is also contained in this documentation’s appendix under “Codebook for MultiLA web API raw tracking data.”
Preparing the tracking data for analysis
The MultiLA project provides R scripts to transform the complex raw tracking data to a flat data frame that is better suited for further data analyses. These scripts are part of the TrackingDataScripts repository. You should clone or download the repository. The unzipped CSV files with the collected data should then be placed under data/raw/<application_session_id>/. It should contain four CSV files: app_sessions.csv, tracking_events.csv, tracking_sessions.csv and user_feedback.csv.
Next, run prepare.R. This will transform the raw data for all application sessions in data/raw to a flat data frame which is in detail described on the repository’s README page or in the appendix under “Codebook for MultiLA prepared tracking data.” The resulting data will be located at data/prepared/<application_session_id>_tracking_data.rds.
Descriptive and explorative analysis of tracking data
The TrackingDataScripts repository also contains functions to aid descriptive and explorative analyses of the prepared tracking data. See the file analysis_helpers.R there and the analysis reports in RMarkdown format.